This is the original BarrierBreaker version. You can find here the ChaosCalmer version.
This project was triggered by a practical need. Somehow, I have never managed to have a functional OpenWRT extroot system from the first try. It seems I always forget something, from the packages needed to be installed to some configuration in the fstab file.
If you have been here before and you just want the files, go to https://github.com/c2sandu/Easy-ExtRoot.
If you want to learn more about extroot and when do you need something like that, you can visit http://wiki.openwrt.org/doc/howto/extroot.
What you get
Instead of receiving a step by step guide of what you need to install, what commands are needed and so on, this project provides a ready made firmware file which includes everything you need installed by default, plus a simple script to extend the root filesystem. After two commands and two reboots you will have a fully functional extroot filesystem.
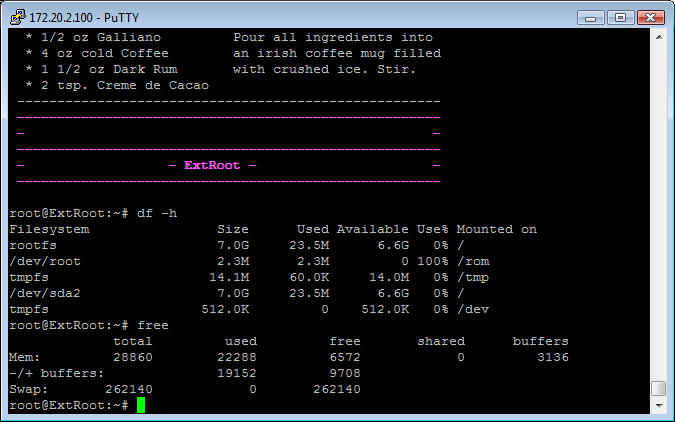
As you can see in the picture above, you will have 256 MB swap space and all the rest of the available storage will be allotted to the root filesystem.
What you need
- TP-Link TL-MR3020 router (update: image available for Hame MPR-A1 clones, too)
- USB memory stick
If you need to generate an extroot filesystem for a different router, you can use the instructions and the files provided below, changing the name of the profile.
Warning
Each time you run the extroot script, the USB memory device connected to the router is repartitioned, meaning that you will lose all the data on the USB memory stick. Therefore, use ONLY a dedicated USB memory stick.
Read the disclaimer before going any further.
Files
You can find on Github the firmware file and the relevant files used to generate the image. The relevant files are below:
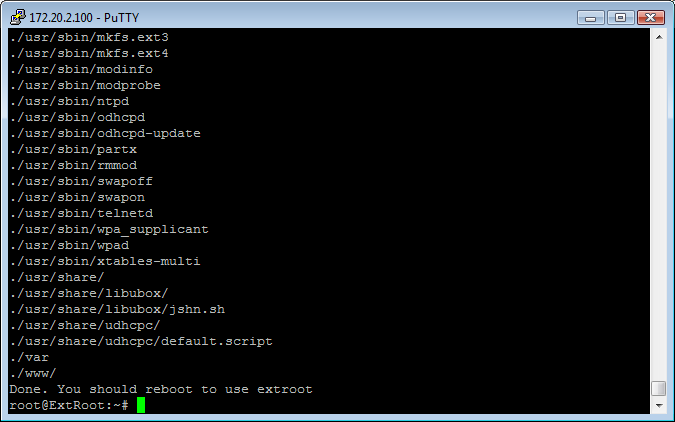
root@ExtRoot:~#tree extroot
extroot
└── etc
├── config
│ ├── fstab
│ ├── network
│ ├── system
│ └── wireless
├── init.d
│ └── extroot
├── passwd
├── profile
├── rc.local
└── shadow
However, if you want to customize your image, you can do so by generating a modified one. The command I used for generating the image from the OpenWRT Image Builder is:
make image PROFILE=TLMR3020 PACKAGES=”block-mount kmod-scsi-generic kmod-usb-uhci kmod-usb-ohci kmod-usb-storage kmod-usb-core kmod-usb2 kmod-scsi-core kmod-fs-ext4 partx-utils e2fsprogs fdisk -libip6tc -kmod-ppp -kmod-pppox -kmod-ppoe -libip6tc -kmod-ipv6 -kmod-ip6tables -odhcp6c -ppp -ip6tables -ppp-mod-pppoe” FILES=files/extroot
For MPR-A1 clone, the command is:
make image PROFILE=MPRA1 PACKAGES=”block-mount kmod-scsi-generic kmod-usb-uhci kmod-usb-ohci kmod-usb-storage kmod-usb-core kmod-usb2 kmod-scsi-core kmod-fs-ext4 partx-utils e2fsprogs fdisk -libip6tc -kmod-ppp -kmod-pppox -kmod-ppoe -libip6tc -kmod-ipv6 -kmod-ip6tables -odhcp6c -ppp -ip6tables -ppp-mod-pppoe” FILES=files/extroot
The make info command will give you the list of predefined profiles you can use.
How to use
- SSH to your router
- copy (e.g. using WinSCP) the firmware file to the /tmp filesystem
- flash the new firmware to the router (see below)

-
- insert the USB memory stick (if it’s not yet inserted). The script will complain and exit if the memory stick is not inserted.
- re-connect to the router using SSH. Default password is d0c55555 (it’s a “zero” there, not an “o” letter) and the default IP address is 172.20.2.100. After logging in, you can change the root password using passwd command.
- run the script /etc/init.d/extroot. You can first review what is inside the script, eventually modifying the size of swap partition, etc.
- reboot and you are done
- there you go! Plenty of space for your packages 🙂
Alternatives
You can find below a link I bookmarked and used before this project:
http://techjim.blogspot.ro/2013/11/tp-link-mr3020-extroot-and-other-tips.html
Good luck!

Hi Yunofun, yesterday I’ve downloaded your altered firmware for my MR3020 router.
But now after the flash, I cannot connect to my router. Have I forgotten something?
I’ve flashed from SSH commandline.
I let it do stuff the whole night (I slept 😉 )
But now I cannot connect.
I’ve tried telnet and SSH 172.20.2.100
But every time I get a time-out during connecting.
What is going wrong?
Greets
LikeLike
Hmm, that should not happen… Double check the IP settings on your PC, then try to get into failsafe mode. Let me know what happened.
LikeLike
My IP settings for the LAN adapter are: fixed 192.168.1.2
subnetmask 255.255.0.0
gateway 192.168.1.1
Just tried failsafe mode. It worked fine. And yres indeed the upgrtade has happened because the routers bootscreen is like ‘– extroot —- ‘ (in pink).
The passwd command gives the error: ‘passwd: can’t update password file /etc/passwd
/etc/init.d/extroot script gives an eror, no usb device is detected.
If I try ‘ls /dev/sda*’ There is nothing.. No usb device detected.
I have upgraded the firmware from a librarybox firmware.
In the firmware my USB FAT32 drive worked like a charm.
What should i do?
greets
LikeLike
Your IP address should be from 172.20.2.0/255.255.255.0 (i.e. your IP address could be 172.20.2.99 for example, but not 172.20.2.100, which is the router itself). Add an IP address from this class to your network adapter and everything should be fine). Let me know if it worked.
LikeLike
I’ve changed my PC LAN IP adress to fixed 172.20.2.99.
And IT WORKED.
yesterday I had tried172.20.2.110 and it did not work.
So thanks for your advice
Keep up the good work!
LikeLike
Hello it’s me again.
Would it be possible to format the USB stick with FAT32?
LIke the Piratebox poject?
If the USB drive is FAT32, I can just put it in my pc and put some files on it.
LikeLike
Thanks for your suggestion. I’ll see what I can do in the next version. The goal of my ExtRoot project was to simplify the process of creating an ExtRoot filesystem (which gives you a lot of space for packages). A project somehow similar to PirateBox or LibraryBox is my DocServer project, which accepts FAT32 formatted USB sticks. But I’ll think about modifying the Extroot project to include also a FAT32 partition, it all depends on whether there is enough free space on the flash to include the necessary kernel module and codepage packages.
LikeLike
Hello Yunofun and Great tutorial, Thanks for sharing it!!!
I got flash your Easy-Extroot in my MR3020, also sh /etc/init.d/extroot runned well and my 4GB Usb Pendrive booted as extroot without trouble. I was able to wire connect my PC landcard and ssh to 172.20.2.100 using a straight ethernet cable to MR3020 Ethernet port.
Problems arrise when i tryed to wire connect MR3020 to my wired lan because i never get ping access to 172.20.2.100 MR3020 Ip address, so i cannot opkg update because i haden’t internet access for it.
My Internet Moden have gateway ip 192.168.1.1 and it have 4 ethernet ports, and one port connected to a 8 port hub where i wired connect my two pc. Then MR3020 Ethernet port was wire connected (cross-cable) to one Internet Modem port or Hub port. But i didn’t got ssh acces to it.
Please, could you explain or point a link to this newbie about how to wire or wifi connect MR3020 to my current lan?
Regards Pescadito!
LikeLike
Hi,
Looks like a physical problem to me. First of all, you should check if the corresponding LED on the MR3020 (and also on the switch/hub or Internet modem) turns on when you connect the (cross) cable. Regarding the cable (cross or straight), the usual rule is that routers connect with PCs with cross cables and with switches with straight cables, so you could try to use a straight cable instead (but usually newer devices autodetect media and it does not matter what kind of cable you use).
Regarding how to connect the box to the Internet:
– if you want to connect it via ethernet cable, you should change the IP address of the interface (and gateway) – ifconfig br-lan 192.168.1.x netmask 255.255.255.0; route add default gw 192.168.1.1; echo “nameserver 8.8.8.8” > /etc/resolv.conf. Keep in mind that when you change the ip address you will lose connectivity with the box and you will have to reconnect to the new ip address. If this works, you can make the changes permanent, by editing /etc/config/network (like below).
config interface ‘lan’
option ifname ‘eth0’
option force_link ‘1’
option type ‘bridge’
option proto ‘static’
option ipaddr ‘192.168.1.254’
option netmask ‘255.255.255.0’
option gateway ‘192.168.1.1’
– if you have wireless Internet access (I understand that you have), it is more simple. SSH to the box and make the following changes:
/etc/config/wireless – should look like below – change name of SSID and the password (and encryption, if needed)
config wifi-device ‘radio0’
option type ‘mac80211’
option channel ‘0’
option hwmode ’11g’
option path ‘platform/ar933x_wmac’
option htmode ‘HT20’
config wifi-iface
option device ‘radio0’
option network ‘lan’
option mode ‘ap’
option maxassoc ‘100’
option ssid ‘ExtRoot’
option encryption ‘psk2’
option key ‘thesecret’
option hidden ‘0’
option proto ‘dhcp’
option isolate ‘1’
config wifi-iface
option device ‘radio0’
option network ‘wan’
option mode ‘sta’
option encryption ‘psk2’
option ssid ‘Your_SSID’
option key ‘your_wifi_password’
/etc/config/network – add the lines below (if not already there)
config interface ‘wan’
option proto ‘dhcp’
Then, issue /etc/init.d/network restart. After a few seconds, you should be connected to the Internet.
If you want to be able to SSH immediately to the wan address of the box (received via DHCP from your AP), you should stop/disable temporarily the firewall (/etc/init.d/firewall stop; /etc/init.d/firewall disable). Now you can connect to the router from the wan.
Let me know how that worked! 🙂
Best regards,
Constantin
LikeLike
HiFive Constantin, and thanks a lot, done!!!
– i haven’t wifi acces yet, so i used wired.
– i connect DSL2 Modem to MR3020 (192.168.1.1) using straight patch ethernet cord and it worked well.
– I set this
vi /etc/resolv.conf
search lan
nameserver 192.168.1.1
nameserver 8.8.8.8
/Esc/:x
vi /etc/config/network
config interface ‘loopback’
option ifname ‘lo’
option proto ‘static’
option ipaddr ‘127.0.0.1’
option netmask ‘255.0.0.0’
config globals ‘globals’
option ula_prefix ‘fd53:7aa2:6c44::/48’
config interface ‘lan’
option ifname ‘eth0’
option force_link ‘1’
option type ‘bridge’
option proto ‘static’
option ipaddr ‘192.168.1.254’
option netmask ‘255.255.0.0’
option ip6assign ’60’
option gateway ‘192.168.1.1’
list dns ‘192.168.1.1’
list dns ‘8.8.8.8’
config ‘route’
option ‘interface’ ‘lan’
option ‘target’ ‘*’
option ‘netmask’ ‘255.255.255.0’
option ‘gateway’ ‘192.168.1.1’
/Esc/:x
Thank You!!
Next i will try to add luci, samba, vfat, and another usb connection to my usb fat32 or ext4 shared disk ….. to have a nice cheap nas usb server.
Regards, Pescadito
PD:
– note that your gparted sda1 and sda2 are like http://techjim.blogspot.ro reference but inverted… could be gparted order doesn’t matter
LikeLike
sorry,
it’s DSL2 Modem (192.168.1.1) to MR3020 (192.168.1.254)
LikeLike
Hi there,
thanks for the great idea.
A few minor remarks maybe you have an idea:
Flashed your firmer (v2) on the 3020mr. System is up and running.
Startpage 172.20.2.110 and connected to my wifi so got Internet through the LAN for the client.
2nd WiFi SSIG “extroot” showing up. WPA is set but “secret”.
1) Want to connect to the 2nd WiFi but need the WPA passphrase. Any idea?
2) As described on 172.20.2.110 I see the option for connecting to another WiFi. That´s fine. Wondering how to access some “Luci” like Webinterface where I can configure the 3020mr completely?
3) Unfortunately the Swap partition was not written (i.e. it´s 0KB). Maybe something went wrong during the flashing of the router. I will need to try flash the router a second time and see if it´s working and where I made the mistake.
Anyway hope you can give me some hints for 1) and 2). Regarding 3) I think I made a mistake in the initial flashing process. SO I will figure this out by myself first without bothering you.
Thanks in advance!
LikeLike
Hi, F!
1. Password for Extroot SSID is ‘secretkey’
config wifi-iface
option device ‘radio0’
option network ‘lan’
option mode ‘ap’
option encryption ‘psk2’
option ssid ‘Extroot’
option key ‘secretkey’
2. If you flashed v2, you can connect using the browser – http://172.20.2.100 and connect to the Internet using the web interface
Hope this helps! 🙂
LikeLike
Hi xandu05,
thanks for the help; really appreciate that.
The mr3020 is working fine and clients got internet connection as it should be.
I can connect to http://172.20.0.100 and setup WISP (eg connecting the mr3020 wireless to my WiFi) really easy from the web interface.
Is there a way to do the further configuration of the router and the settings via a web interface or is this just possible via ssh?
I am asking because I just see the web interface for making the connection to the internet but no further options for configuring the whole router.
LikeLike
Of course, after Extroot is working, You can install Luci in order to have a web interface – opkg update; opkg install luci. Indeed, there are no further options in this project for configuring the router, because it was out of the scope of the project.
LikeLike
Hi xandu05,
thanks again.
Now I got and fully understood how you designed this project and the purpose of it. Great idea.
So I will play a little with this nice peace of firmware….
LikeLike
hi thanks bro
its worked!!!
LikeLike
hi thanks is works 🙂 but how can i revert router to normal ?
LikeLike
Follow EXACTLY the steps in the link below.
Be very aware that you need to process the original TP-Link firmware. If you use the original firmware image file downloaded from TP-Link site, you’ll end up with a bricked router (trust me, I’ve done that).
https://oldwiki.archive.openwrt.org/toh/tp-link/tl-mr3020#restoring_original_firmware
Good luck!
LikeLike